Ever walked past a lawn that looks sharp, clean, and almost too perfect? It’s not just the grass or the flowers catching your eye. It’s the edges. Crisp lawn edges make the entire yard look polished and cared for, even if the rest is pretty simple.
Most people mow the lawn and call it a day. But the difference between a good lawn and a great one often comes down to how well the edges are done. And no, you don’t need to hire a landscaper. You just need to know what makes a visible difference.
Here’s what separates the sloppy from the standout.
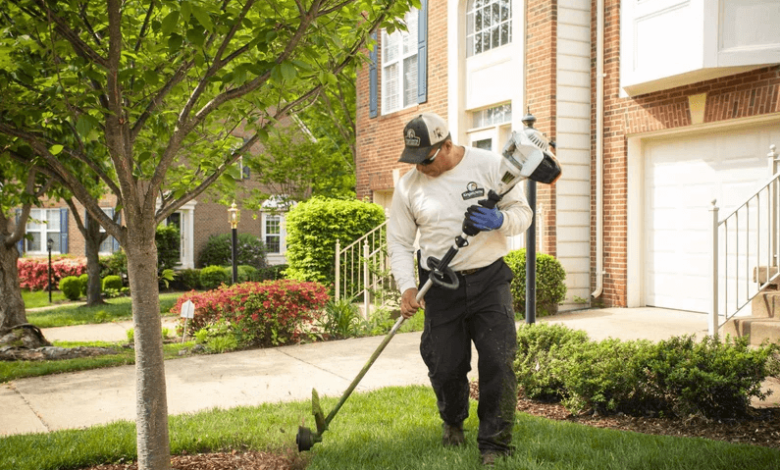
1. Use a Weed Wacker the Right Way
This is the easiest tool to start with, and probably one you already own. The key isn’t just using it, but using it with the right technique.
Turn the trimmer sideways so the string is vertical. You’re not mowing, you’re sculpting. Glide the edge of the string along sidewalks, driveways, or flower bed borders. Do it slowly, keeping a consistent line. This gives you that clean, vertical edge that mimics a pro’s work.
One mistake people make when using a weed wacker is angling the trimmer too much, which shaves off too much grass and makes the line uneven. Keep your wrists steady and go in straight passes. You want the edge to look like it’s been carved, not chewed.
2. Define the Edges with a Flat Spade
Even with trimming, sometimes the border between lawn and garden gets fuzzy. That’s when a flat spade comes in handy.
Push it straight down where you want the edge to be, then gently pull the soil back to reveal a clear line. You’re not digging a trench. You’re simply creating a clean cut between the lawn and whatever’s next to it.
This works especially well around flower beds or trees. It also helps prevent grass from creeping into places it shouldn’t. Once defined, these lines are easy to maintain with occasional trimming.
3. Mow with a Purpose
Mowing may seem like a separate chore, but how you mow affects how your edges look. When you mow too quickly or miss the corners, it shows in the outline of the lawn.
Make one pass around the edges before mowing the rest. This gives you room to turn the mower without tearing up the edges or flattening grass in weird directions.
Also, make sure your mower blade is sharp. A dull blade rips the grass, leaving it frayed and uneven. That messes up the look of the edges just as much as neglect.
See also: How to Prevent Plumbing Problems in Older Homes
4. Keep a Defined Border
Lawn edges only look good when they contrast with something. Whether that’s a path, a bed of mulch, or gravel, the clean divide is what makes the edge stand out.
If your lawn just fades into dirt or patchy weeds, there’s no point to edging. Add a clear border with materials like:
- Mulch – makes garden beds stand out while keeping weeds down
- Stone or brick – gives a structured, classic look
- Gravel – works well along driveways or side yards
- Metal or rubber edging – flexible and helps maintain shape
These borders stop the grass from spreading sideways and keep the trimmed edge looking neat for longer. It also helps with water runoff and creates a frame that makes the lawn look more intentional.
5. Edge When It’s Dry
Timing matters. Wet grass doesn’t cut cleanly, especially when you’re trying to create a crisp line. It bends and clumps. The result is a rough edge that won’t hold its shape.
Wait for a dry day. Even better if it hasn’t rained for 24 hours. This helps your tools work properly and gives you a better view of what you’re doing. You’ll make fewer mistakes and get sharper results.
If you’re trimming in high humidity, stop occasionally and clean the tools. Buildup on the trimmer string or blade can start to tear instead of cut.
6. Don’t Rush the Corners
Straight lines are easier. Corners are where it gets tricky, and where mistakes are the most obvious.
Slow down and work around curves with short movements. This is especially true around tree rings, curved paths, or flower beds with unusual shapes. It might take longer, but the result is worth it.
Using a small hand tool, like a half-moon edger, can help refine curves and avoid overcutting. Once you have a clear shape, it’s easier to maintain it with your trimmer.
7. Stay on a Schedule
Edges don’t stay perfect for long. Grass grows fast, and if you leave it too long, you’ll have to redo all the hard work. Set a rhythm to keep things under control.
Here’s a simple rhythm to stick to:
- Every 1–2 weeks – trim edges along driveways, walkways, and beds
- Once a month – refresh any spade-defined edges or borders
- Spring and fall – reassess all edges, fix overgrowth, and sharpen tools
Consistency keeps the lawn looking sharp with less effort over time. Skipping weeks means more time later correcting messy lines and overgrowth.
8. Sharpen Your Tools Regularly
A dull blade or worn-out string is your worst enemy when trying to create clean edges. Sharpen lawn tools every few months. Replace string trimmer line when it starts to shred or tangle too easily.
If you’re using a spade or half-moon edger, keep the edge sharp with a simple file. It doesn’t need to be razor sharp, just smooth enough to make clean cuts in soil or turf without too much force.
This not only improves results but also protects your lawn from unnecessary damage.
The Finishing Touch That Sets It Apart
The difference between a passable yard and one that turns heads is often found right at the edge. Neat borders and crisp lines show that someone paid attention, and it instantly elevates the entire look of the property.
You don’t need expensive equipment or professional crews. Just a little technique, a bit of patience, and a few key habits. Stick to these basics, stay consistent, and those clean, professional-looking edges won’t be a secret anymore. They’ll be your signature.